Pages

Thursday, June 28, 2012

Finger Weaving Demystified

The first time I heard of ceinture fléchée was in the Guild of Canadian Weavers test program about 1998. In one test question it was one of three items listed and the test candidate had to choose two of the three items to weave. I looked it up and discovered that it is part and parcel of Canadian history!  I had no experience with this, or prospect of an in depth learning experience with it at the time so I went with the other two options. (The test questions were later revised and this disappeared.)


A few years ago I discovered a loom woven sash at a local antique dealer and wrote a blog post about the sash. It seems to get more than a few visitors even today from search engine results!  After my one day workshop with Sash Weaver Carol James, I now know that it is not true ceinture fléchée. The real deal is done by hand.  A true finger woven sash takes upwards of 300 hours to make! They eventually resorted to loom versions to reduce time and costs and this in turn put some of the handwoven sash makers out of business. They simply could not compete. It became a 'hobby' and the numbers of those actively weaving and teaching reduced steadily over the years. {I couldn't help but notice the similarity of decline between the sashes and the Aboriginal Dancing Blankets. A few dedicated weavers but overall,  a greatly reduced craft. Though, no doubt in Canada,  Quebec and Manitoba have the majority of those artisans still working with this technique.} 


To me, its weft twining, such as many cultures use in some form or other. Sometimes its a special technique, the colours used or special pattern arrangement that uniquely connect it to a given ethnic or cultural group. In Canada, the Metis feel a special connection to the brightly patterned sashes and many of French Canadian or  Québécois  heritage, such as Acadians,  also embrace the technique as a part of their collective history. My husband's grandmother (last name Godin) was of Acadian ancestory.  It is an old and beautiful technique and quite time consuming to make. The fact they have a colourful past makes them all the more interesting! There is a lot of information on the Internet for you to browse if this historical aspect appeals to you


Meet Carol James,  Sashweaver. Her blog is an interesting read!  Carol wrote this book:


It covers basic techniques of finger weaving, and identifies potential mistakes and how to fix them. I bought her book some time ago and had every intention of giving it a try but you know how that goes! Life gets in the way and other looms call to you instead.  So when I heard Carol would be here on the south end of the Island, I signed up! It was a one day workshop and Carol admitted that its a lot to learn in one day, especially when she teaches it as a seven week course in Winnipeg!


We started with small simple braids manouevring the threads on the table surface. 


When we progressed to the next step, Carol worked one on one with each of us in turn to show us the two finger techniques necessary to work the threads. A scissor movement and a pinch and both done with threads everywhere in your hands!  The scissor one always seems to catch me up and it meant you had to mentally repeat to yourself "scissor, pinch, scissor, pinch...." so no talking and total focus on the task in hand!
The support post was slipped into the back of the chairs and eventually as each student was shown the technique, the 'conga' line got longer and longer!


The rest of us waiting our turn worked on our smaller braids and tried varying colour arrangements of the threads. See the woman with the green top? That's Charlotte and her story is a nice one. She had a guitar strap made from finger weaving and backed with leather from the 1970's ( and possibly older) and she had attempted finger weaving back then. It has been one of her goals to recreate this guitar strap weaving and so she was excited to be there in the class. At one point, the joy of successively managing the finger movements and seeing her braid grow, Charlotte expressed her happiness!   It was such a moving moment, so I picked up my camera and asked her to tell me again and I snapped this:


 The rest of the class came from all parts of the Island: Duncan, Nanaimo, Qualicum Beach / Parksville, Coombs, Cobble Hill, Victoria and Cowichan Bay. In time we were all linked by our chairs  and finger weaving away and Carol was valiantly moving from student to student as disasters happened.  Dropped your entire shed? GREAT!  let's see how to fix that! Edge threads all discombobulated? Lets's see how to reweave them!  Some of us were frustrated at the slowness of getting and maintaining the finger movements and Carol commented that if we could master them successfully in one day, when she teaches it as a seven week course, she would be very surprised. It takes time to attain the muscle memory necessary to become proficient and do it automatically.

Carol had some amazing samples to show us as well. Let's see some more modern interpretations:


This is Carol's computer cover! Click to see the detail in the close-up shot.


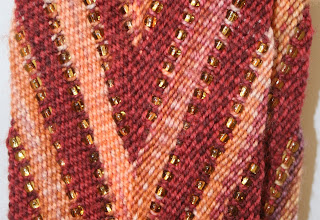
Here's a scarf that incorporates a painted warp and beads. Very pretty!


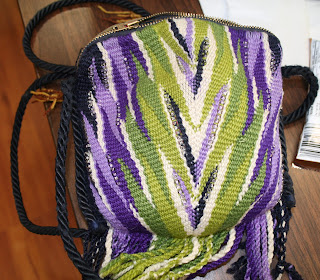
....and this is Carol's purse! It was simply lovely....

There was also more traditional representations of course. Below is an arrow and lightning sash:


This one has beads along with the arrow heads and lightning bolts and they are called pearls:


It has some weight to it!  I don't know for sure but I somehow think it was for more ceremonial purposes.


This one reminded me of a blending of traditional and more modern colours. A nice combination.


This is an Assomption style sash. Carol told us the story of how the women who wove this style of sash asked for a raise in pay for their work and in time the Hudson Bay Company found a cheaper alternative.


Something like this. This is a loom woven (possibly Jacquard) sash which would have sped up the production time. Take a look at the close up and you can see the weft shots:


You can even see a skip! I can well imagine the conflict these produced. Cheaper, quicker and more affordable versus beautifully woven by hand which takes time and would cost more... but be traditional. Its the age old struggle for many artisans throughout time!

I purposely set both sashes side by side for a comparison:


I know which one I would choose but then I'm a weaver!  Some people just wanted the colours and a quick sash... some went for the quality of hand made. It came down to the individuals and their taste, and what they could afford I guess.  Traditional finger woven sashes nowadays are well beyond the reach of most!
That's the segue to a whole topic on pricing our products to reflect the true value of our time but I'll leave that for another day!

Carol  published another book last year! This time is on an even older technique of Sprang. Perhaps a workshop next year on this techique?


Sorry about the flash glare but it was the best of three shots! The shawl that is on the cover was there as show and tell and it is delightful! Somehow I missed taking its picture.... oops!  So some other examples:


Painted warp ladies vest....


Here Carol is modeling her sprang vest that also combines card woven bands. Both techniques are very old and shows nicely how both could used together to make a useable garment (albeit decorative!)

Carol told us about the military sashes worn by men of rank in 19th century Europe. The man with the sash was in charge! Old paintings depict many a battle scene and someone 'at the top' is there with a sash. Did you know that the sash was most likely sprang?   I didn't know that!

Here is a military sash:


They could quite wide when expanded and very decorative.  Carol told us a story of how George Washington accepted a sash from a defeated British General (who had been given the sash by his father in the early 1700's). George carried that sash throughout the Revolutionary War of Independence. It's stored and not on display at this time. Now that's a pity!

When I got home, not only were my feet tired but so was my head! There was a lot of concentrating done that day!  I also had the handicap of being tired to start with as the night before when Calli our Airedale went out for her last call of the day, she bolted into the night after something!   When she returned, she was covered in sticky black muck, most likely from the creek. So at midnight, she was hosed off outside and left to dry off and sleep in the laundry room..... except, she didn't get the memo! She cried and make a fuss all night long.   The next morning, far earlier than I needed to be up or intended to be, I discovered she had done some 'creative claw work' on the back of the door. Apparently being smelly dirty should be no impairment to sleeping in her rightful place on her comfy bed UPSTAIRS!   She doesn't go outside off leash any more and the new door arrives next Tuesday.


Does this face look like it could do something like that? Yup, and she'd do it again in a heartbeat too. She's a terrier (terrorist) through and through....

Saturday, June 23, 2012

Emmatrude part 2: The Loom Faeries!

I spent two days under the loom pulling off cords and all the while I was thinking that they had to go back on in a much more deliberate, slower fashion with a designated spot for each. That was going to a much slower, longer job than the random pulling off of the cords!

After getting up and stretching, and getting blood flow back into some body parts,  I checked my phone for messages and there was the most amazing email there from my friend Lynnette. She and her daughter Ngaire were offering to come and give me a day of help with my loom! No arguments would do, none at all.

 I was gobsmacked!
What a wonderful offer!

Well,  I went straight into oiling the loom's wood right away. Fortunately, we had a few fine days with a light breeze and so I had all doors and windows open while I worked. It took two or three days from start to finish. Some sections of the loom 'drank' up the oil and soon it all glowed. It sat for well over 24 hours and then I buffed the excess off.


I had left the lower lamms in place so I started by re-hanging the shaft and heddles. The heddles took a bit of time to straighten out being somewhat tangled. Then I re-hung the first upper lamm and then measured six inches from the bottom of the shaft stick to the top of the first lamm. Then measured six inches from the bottom of the upper lamm to the top of the lower lamm. Now all other lamms will be hung to mirror this one!

I had everything ready and all the new cords handy. Time to call in the girls!  Lynnette and Ngaire had an early start to their day as they had a two hour drive to my house and they arrived at 9:30 am!  A cup of coffee and they went to work....


Ngaire attached the cords to the eye rings under the lamms in sequence and Lynnette threaded the cords through the large eye ring at the foot of each treadle and then pulled the cords through their individual spots on the peg board.


Slow work and very fiddly but two of them made much shorter work of it than I could on hands and knees going back and forth by myself.

We chatted, laughed, listened to music and talked about the memories that music can bring back to you from past days. It was fun and  so great to have so much energy in my studio!

My husband made us all a great lunch of salad and mini lasagna's and I had baked some goodies. A rhubarb coffee cake, with the rhubarb from our garden of course  :)

After lunch, they got back to work! What was I doing? Talking, laughing.... and I even finished weaving a runner.


Here you can see they are very close to being done.... and then, suddenly....


It was all finished! Understandably, they were happy and proud of their big job! What a pair of good friends... its enough to bring a tear to the eye.    Then they were on their way home. It sure was quiet here after they had gone.  We are sure lucky to have friends like this.

So is it done? No, there will be a Part Three as there are tasks to be done to set the cords for use but I can manage that by sitting on a stool at the back.

Time for an Ethan update!
He's two months old as of today. Sorry for the less than clear picture but its here because of the smile! The lovely blanket underneath him was from his other grandmother and she had cross stitched all those Winnie the Pooh characters on by hand.  Being Italian by birth, she is his Nona and I'm English, so his Nana.


Tuesday, June 19, 2012

Global Warming Hits Close to Home


This is what a mild winter looks like six months later!   Have you ever gone for a drive along a country road and noticed the 'tents' hanging in the tree tops? Well, the Forest Tent Caterpillar runs in ten year cycles and when an infestation occurs, it takes three years to get under control again. The moth lays 300- 500 eggs per nest and although we cut and destroyed all we could reach in our orchard, the thirty to fifty foot alder trees were unreachable! (Especially when they were on the neighbour's property) So for the past two weeks we have been under invasion. They literally crawl uphill like they are programmed  little zombies. You could see them coming up the driveway and through the lawn. They eat everything in sight! We started picking them off the flower beds and a cascading wall of a native vining plant called kinnikinnick (or bear berry or Uva Ursi)  They *LOVE* this plant and once on it, they dine and then seem to go into some sort of orgasmic coma. You can pick them off and they lay still like they are stoned or something.  The trouble is, they eat the blossoms. The local bees and bumble bees wait all year for the wall to bloom!  So while I gave up on the thousands elsewhere (no lie!) I did work to keep the  kinnikinnick wall clear. The honey bees just buzzed around me and I made every effort to stay clear of them working the flowers.


As you can see here... the flowers are catching heck! Click on the pictures for a close-up!


Here is healthy bear berry that I have managed to keep the 'Pillars' off for the bees.   (We have started calling them the Pillars ... as in " the pillars will get you!")   They like straight lines such as the boards in our deck and so you see little convoys of them all in motion to and fro.  The jar shown above is a 2 kilo peanut butter plastic jug and it has been full to the brim several times with no effect. Eventually, you go inside and ignore them as Mother Nature will win this round. Trouble is, they'll be back next year too as it will be year three.  

The last time I can recall them being this bad was back in the late 1980's when we visited Salt Spring Island when out touring on our boat. The fall country fair was on in Ganges and we found jars of 'pickled tent caterpillars' on display and even entered into the fair for judging. The lady who had brined them up told me the fair was about the local bounty and since they grew more of them than crops, why not?  

I'm concerned that the ants will be enjoying the extra bounty of dead caterpillars and increasing their numbers too. They seem to be the only thing that eats them. Birds leave them alone unfortunately.

We have another casualty this year. My favourite tree.  I went looking for a decent full length picture of it and now I'm further saddened by the fact I didn't really take its picture while it was healthy. Here it is in 2009:


Well, the base of it anyway. It had just prevented a group of three large trees from falling and hitting our house. I was sitting having my early morning coffee when I heard the crack and watched them fall!  This old fir that must stand at least 80 to 100 feet tall, blocked them from coming towards us and redirected them to fall behind the hedge in a nice tidy heap. What you see there is some of the firewood from the adventure.  It resulted in many trees being taken down due to disease or age in the coming weeks between our property and the neighbours. They had developed  a condition called cone rot.

In  late September 2010, it looked like this:


The needles aren't as lush or as green and we called an arborist in to look it over. The back needles on the inside end of the branches had gone brown months earlier than they normally do and were falling off. He had to go and do some research and when he got back to us he told us it was an infestation of a silk type worm. It would either make a come back or fail completely. You might recall sometime walking under a tree and there is a little worm hanging from a fine thread? well, its those little things.

Six months later:


Its lost the fight. Those sweeping branches that I saw an owl sitting on one evening twilight, looking so much like a Robert Bateman painting, will be coming down this fall. A casualty to worms that didn't die off this past mild winter or the one before.

We have other pests too. Oh, there are raccoons here, and feral cats from time to time. Wild rabbits in the meadow and the odd neighbour's cat comes hunting birds. Bears in the fall and we understand cougars pass through here spring and fall at the change of seasons. There are also ever present deer. We have a much smaller variety here called Island deer. Most tourists see them by the side of the road and think them cute as they look like babies, but those are full grown! I've watched them go from standing still and leaping over a five foot fence with ease. They have brought down full fruit frees and cleared entire crops  from the trees.  They eat anything you plant for flowers around the house except for heather and lavender.  The (so called) deer proof Lily of the Valley?  gone.... My glorious purple lupine? gone in one night!
So we bought tomato plants and a new small Japanese maple and put them in pots on the cedar deck to keep them away. They only go on the grass or natural ground... right?


Apparently not. Half the tree was eaten and they took all the shoots and flowers off the tomatoes. They've all been relocated to protective custody on the upper deck, behind bars.

We personally have made many choices to 'do our bit'. We compost kitchen vegetable waste, participate in a kitchen scraps composting pick up, recycle all we can at home, and only put out one bag of garbage every two weeks. We multi task our trips to town to maximize on fuel. We turn down the heat, and switch off lights.

I hope its enough.... we have a grandson and his future to consider now.

A parting picture or two:


This an old variety of Allium is just coming into bloom.. The perky star star like flowers can be picked and toss into a salad. They taste like chives or onions. Some gardeners we had here two years ago said that they hadn't see this plant in years as its an old varietal. It seems most people go for the purple globe types now.
Best news? The deer leave them alone!  

Today as I was typing the basics of this post up, we had a big shadow swoop by the patio door and eventually a large bird came in for a landing.


I had my camera nearby and Bruce crept out and took several pictures quickly. A big Turkey Vulture had landed in the dead fir tree. Now you can make of that what you will!

Back to weaving next post....

Tuesday, June 12, 2012

Emmatrude's Spa Treatment part 1


My dear husband, under the disguise of changing a light bulb for me, took this sneaky picture of me weaving on my last project,  Ethan's receiving blankets, on my large loom I call Emmatrude. I would have liked to have pulled a comb through my hair... oh, well! The project width was thirty six inches wide which was an adjustment for me after narrower scarves.  It was after completing this project that I discovered the severe fraying of the 20+ cords. I knew that there was a big job ahead of me and even as of today, I'm only half way (hence the part one!) The basic fact is, the loom is a tool and has moving parts so maintenance is not only required but to be expected.

{I can recall weaving on table looms and small floor looms at round robin weaving workshops that were in terrible shape. It just never seem to occur to their owners to tighten nuts and bolts, repair or replace parts or even clean them! One teacher I know would always ask someone to bring along a weavers tool kit for just these looms that inevitably appear. Don't be intimidated by your loom! Learn how it goes together, how it works and keep it in good shape. It will give you a great weaving experience back for many years! Not to mention increase its resale value...}


It has also been awhile since I last gave the loom a rub down with an oil and normally try to do this every two years in the summer time so I can have the doors and windows open for ventilation.  I think its been five years!  Okay, its time.

I have the new cords in hand from Woolhouse Tools. I'm keeping the older cords on treadles  1 and 2 and treadles 15 and 16. They haven't been in use much and so just fine. Its the centre 12 treadles that must be replaced with new. Now to be fair, not all cords are in bad shape. I'll be keeping many of them and using them as repair cords for the future.


Here you can see I have pulled the pegs and dropped the centre 12 treadle cords. At this point I thought I could leave the two treadles on either side in place so they are still set up.


Here you can see that I have removed the back four shafts worth of cords from the  loom. This is where it gets a bit complicated.  The cords on the back shafts (9 to 12) actually have less distance to travel to the back of the loom, so they are overall shorter than the centre four, then the front four shafts. Then you have two cords for upper and lower lamms and these are also different lengths as one must physically rise further to reach the upper lamms.
So I must take the cords off the back four lower lamms first and then the upper lamms in sequence.  I used gel knee pads and a large pillow and lay on the treadles and just got busy. Short cords? throw in one direction... long ones in another. When all done, get up and stretch... and then bundle the cords and mark what they are for length and where they came from.  Take a Robaxacet for the back and get back under again.

Then I moved to the centre four shafts (5 to 8) and did it all over again.  By now, being under the loom for long periods of time with my thoughts, with great tunes playing on the iPod player, I came to realize that  putting the cords back on must be done one shaft at a time, upper and then lower lamms, just like when it was when it was initially set up. The two treadles on either side with all their cords would make that process next to impossible to do as there would be a sea of wood and eye rings and the chance of placing on the wrong one very likely... and very hard to correct. Okay, they had to come off too and also in the  specialized size shaft groups.  *sigh*


So, here you can see I have taken each of the side two treadles completely off (and marked with which shafts they came from and their lengths for going back on later)  I've now  completed the centre four shafts and only have the even longer cords for shafts 1 to 4 left to do. Bruce came and spent some time under the loom at the front and took most of these off.  Then we were done!


The tied yarn on a couple of eyes in this upper picture show where two cords frayed almost right through. We're thinking there must be a metal spur or two there so will be replacing those eyes for new ones to be safe.


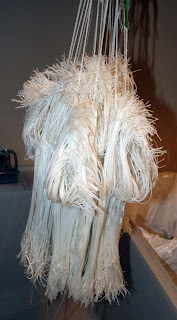
Here are the six bundles of the centre treadles all trussed up and ready for storage. The badly frayed cords were removed and the good parts of those cords can be cut and used for tie up cords on my Louet. Mainly they will provide a supply of repair cords for the 20+.

Now its time to think 'spring cleaning'. The loom was thoroughly vacuumed and wiped down with a damp cloth. I used Murphy's oil soap on the front breast beam and the top beam of the beater. There was a lot of dirt and oils from my hands, despite hand washing! I dismantled the shafts and upper lamms and bundled the heddles from each shaft.   They went into the laundry tub for a dunking and came up much brighter! The water looked like tea!  Here they are drip drying....


They dried quickly and looked brand new instead of a dingy grey.


The heart of a loom is its shafts and with them gone, it looks quite gutted!  I have left the lower lamms in place and hope that when it comes time to re-cord the loom, they aren't in the way. If so, they have to come down too. I'm trying to reduce some work where I can!

We finally got a couple of nice warm breezy days so I opened everything right up and oiled the shaft sticks and upper lamms.


I have an old towel down on the floor and stood the newly oiled parts up against the front of the loom to soak up the oil. The glow is beautiful and they visibly brightened.  I could imagine the main portions of the loom enjoying the coming treatment too!


In these two pictures, with the exception of the cloth beam and the sectional rakes where warp or cloth will touch, all have received an oiling,  and then a further  rub down to come to remove the excess oil.

So I'll end with where I am as of today. I've made a start at replacing the shafts and heddles back into position. The heddles go back on nicely but they are all criss crossed and I'm separating them. That should keep me out of trouble for a while.


Looks better already doesn't it? I will hang only the first shaft upper lamm and do measurements to have them all hanging in their right positions, six inches apart. This is to maximize the size of my shed by allowing proper movement of the treadle from its resting place to the floor when depressed.  Once I'm into replacing the 20+ cords, the balance of the upper lamms (and lower lamms?)  will go back on in alignment with the first shaft and line up like little ducks. Time will tell if I can leave the lower lamms in place or have to take them down and add back in one at a time. At this point, it's a minor detail!

You do realize that this report is based on *many* days of chipping away at the elephant.... right?  Part two will no doubt take equally long. There is no hurry as I do have another loom to play with :)