Pages

Friday, December 31, 2010

Looking Back.... Before Moving Ahead

I have been thinking through the past days of this dwindling year as many of you are also doing. I don't make New Year resolutions but reaffirm personal goals. Its usually a short list of three to five things I'd really like to see or do in the coming year and then try to include them with what ever life has lined up for me.
Life is like a ride... are we taking the yacht or the row boat?

I did weave more this year and I also became better acquainted with my spinning wheel again and in fact by late in 2010 I had added another wheel to the fold. I'm not a serious spinner but do it more to relax. One of my goals is to spend time spinning outdoors on our new deck.

A black silk warp 'disaster' that finally, successfully graced Madge!

We demolished our kitchen, dining room, stairwell and laundry room (it was flooded out!) and five months later it was basically complete including new patio doors. In addition to all new exterior doors and decks, we revamped much of the upper flower gardens and  planted a new Catalpa tree. There was the ongoing and seemingly endless yard clean up of old fencing and scrub.  So it was a long, expensive and *very* stressful process that is now mitigated by a lovely kitchen to work in,  and a garden deck space that will be fun this coming summer.

From old and tired....

to .... new and improved!

I was over to Vancouver more than a few times to help with regards to my father's health crisis. This was ongoing for two and a half months but he's home, much improved and still living independently. We had a wonderful chat via phone this Christmas. We go back a long way and I'm *very* happy he's still here with us!
Dad
I did manage to visit friends in a short trip away and they returned the favour by coming to visit and it was good to hear they liked our improvements! I also gained new, long distance friends this year and they came about due to this blog and I'm  so happy they are there.

Lynnette at the Kelowna Spin in


Dorothy across the Pond in Scotland

 We had to say good bye to our little terrier, Connor, after thirteen and a half years which was quite the wrench but we are now looking forward to  a new pup in May 2011 or so!  We are ready to surrender to the cuteness and chaos that will be unleashed.

Connor at 8 weeks old.... let's go!
There is a theme that runs through all the above :  All have a positive outcome, no matter how scary the start!      So while I have no idea of what 2011 holds for us, it will all work out okay in the end.

Our Christmas turkey this year!

Whether you are at home comfortably alone or celebrating with friends, I wish you all the very best as we ring in the New Year!

Thursday, December 23, 2010

Tis the Season


Its the day before, the day before Christmas! Isn't it funny how my childhood memory of  December 23rd  is extra special. It was the peak day of anticipation! I think it has always given short shrift as a day that is in the way of the 'real days'... or if you are an adult, its the day that isn't nearly long enough!

We are about as ready for Christmas as you can get here and grateful we aren't being affected by nasty winter snows or floods. We have a roof over our head, food on the table and reasonably healthy!

We had to reacquaint ourselves with our tree and its where abouts! Last year we were treeless due to the kitchen flood and impending demolition. The boxes has been taken down to the garage to be stored and never made it back to the house until recently. As I pulled out the decoration boxes with 27 years of Christmas past, I found that mice had check things out sometime this summer! Fortunately, they just nibbled on the tissue paper and then exited, so we only lost a few items.

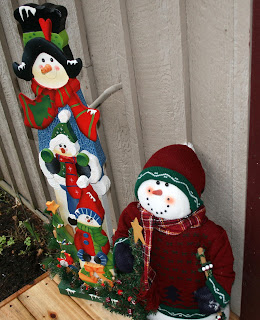
Our tree has a star theme and we have a snowman theme for decorations around the home. You are greeted at the front door by these handsome fellows:


Then on the mantle, along with garlands and lights:

There are a couple of other smaller cohorts but this is the troop leader! Then there is my favourite:

Just love his sweater and scarf! Then this year we have our very own handmade stockings by Lynnette !

They feature her handwoven fabric along the top and in mine, the foot. I have them filled out with some tissue paper to give them shape until Santa fills them! Bruce's is quite the dandy huh?

I have received some lovely woven cards this year!

From Martha in Utah on the left and Joan in Kamloops on the right.

Now we have some other creative, personalized cards...

This one is unique! Alison took close-up photographs of snowflakes (no small feat!), placed them into a computer program and digitally played with them and created her one of a kind card, with small added snowflake to the front. The card stock is beautiful quality as well.

Then my two friends who live thousands of miles apart, both sent 3D type cards! (Funny how that happens..)

Guess that's why they are my friends!

Last one is by a long time family friend Joan Rowan who is watercolour artist. Every year we get a printed version of one of her recent paintings:

"Made In China" The mountains at Zhang Jai Jie, artist Joan Rowan
Joan and a group were in China earlier this year and visited the Zhang Jai Jie region with its uniquely shaped mountains, that inspired the floating mountains in the film Avatar.


I'd like to take this time to wish you all a Merry Christmas and to thank you all for visiting my blog through the year. I have come to know some of you rather well and feel I have friends around the world now. I hope your time with family and friends is a memorable one! 2011 is just around the corner and I see it as a fresh, clean slate on which to lay out your plans and dreams. One goal we have is to bring a new puppy into our lives in the spring.  The plan is a male Welsh terrier and his name will be Gwyn ( Welsh for 'fair').
This is not him, but he will be something like this:

This is Griffin of Snowtaire Kennels and he's just too cute for his own paws. I don't know how they got him to lay still for the picture...

Happy Holidays everyone!

Thursday, December 16, 2010

Switch to Plan B

So if it hurts to sit on my loom benches and weave on my floor looms right now, then how about a comfy supportive chair and my Louet Jane table loom on its stand?

So I dug through my stash and found some silk/ wool blend that I hand dyed back in 2000 for a calendar project. I have been pushing the left over yarns around ever since and thinking to myself "got to do something with that' ever since. Its time has come!  I found a pin wheel draft I liked but knew it wasn't the one I had used in 2000... but close enough right?  The yarn is 60/4 in grist, 60% silk and 40% wool and is 6400 yard per pound and so quite fine. My old weaving notes say my sett was 32 epi. I used a 12 dent reed sleyed 2,3,3. Okay... and I was off to wind my warp. I decided that I would do only one scarf this time as I would be bored to sobs by the end of it and two would be a bit much! That's a lot of lever flipping. So  seven inches wide equals 232 ends all 3 yards long, and a bit later it looked like this:

The Jane is neat to wind a warp onto! If you are a neat freak, then this picture is all kinds of perfection. All that's missing in this shot is the lacings between the metal rod and the wood rod which happened right after I took the picture. ( In fact the Louet looms are all designed with ease in warping).
The front of the loom looks like this:

The levers are all down  (which raise the shafts) and this keeps them out of the way of the warp through the raddle, then there is a simple wrap around the breast beam to provide some tension. So far, so good!
Winding on started and went smoothly. I did a round of slim warping sticks around the lumps and bumps, then switched to heavy brown paper.

See? It went on so smoothly! Next, I flipped the beater up and over to the back, then lowered the lease stick ties so they held the lease sticks down lower for threading. In my comfy chair and did the straight draw threading of 1 through 8. Then the sleying of 2,3,3 in my 12 dent reed.  Tie onto the front and start weaving according to my substitute draft.  It looks a bit too open for my liking but my notes clearly states 32 epi and I recall the fabric was lovely.  Actually I'm not feeling the love for this pinwheel ...

I felt I needed to double check a few things before going any further. I rummaged around for half an hour in my studio and finally found the old calendar! I wanted to see and feel the cloth and know if the 32 epi is better after wet finishing. Even better was that the old draft and tie up was printed too!!  I had forgotten about that. So I plan to 'un-weave' this section and use the old tie up. You'll see why in a minute.....

The Ponderosa Spinners, Weavers and Fibre Artists (Kelowna, BC) were casting about for a fund raiser and  guild member Christine Kirtz came up with the idea of doing a calendar. At first it didn't get a whole lot of support, but that didn't deter Chris one bit. She put the bit between her Irish teeth and went full steam ahead. She did all the pricing and planning and while she couldn't find twelve weavers, she did find six. So one sample for every two months.
More people were coming on board and provided yarns, inspiration or  help dyeing yarns. Soon there was a buzz going and I started to wonder if the planned 100 calendars would be enough? I believe they settled on 200 copies.  I agreed to do a sample and my yarns were the one purchase they did make that I can recall and the silk wool blend was discounted by Treenway. I dyed the yarns with acid dyes to produce the violet and what I call charcoal gray. It was supposed to be black but didn't go as planned. { I had such difficulty dyeing blacks that I still buy professionally dyed black silks...  and yes, I followed the instructions!}

To see these or any photos better, click to embiggin!

January/ February was shadow weave in orlec by Lyndsay and June.


March April was a medley of alpaca woven Log Cabin style by Ellie. I believe the alpaca was hand spun so extra kudos to Ellie on this one!

May June was Christine's and featured a hound's tooth check in wools. I have done this draft myself in different colours to great success.

July and August was woven by Julia in the neat coloured cottons from Fox Fiber. They change colour and usually deepen in shade as they are washed.

And here's mine! September October in the pinwheel pattern I really prefer! The wheels are crisper and clearer... see...

There's nothing wrong with this sett and I love the swirly stars. Yup, I'm unweaving and switching to this one.

The last sample for November December was rose path/ point twill that resembles  log cabin, but not really.
If the name is familiar, Linda wrote the Magic of Linen and the recent rewrite " Linen: From Flax Seed to Woven Cloth". Yes the sample was woven in linens. (what else could it be?  :)

The calendars were a huge hit and they quickly disappeared. Christine's project raised $800.00, after expenses,  for the guild's bank account and I still recall her happy face when Chris gave her final report.  Chris and I stayed in touch for many years via email after I moved. We would usually discuss some new draft or yarn she wanted to try and once armed with some information, off she went to weave. She was not afraid to try anything and I admired that in her. She passed away a couple of years ago but two weeks before she died, she was asking me a weaving related question! Amazing lady....

So my sciatica is starting to settle down, I have some weaving to play with and a new wheel to spin on so what's not to like? I know this is a crazy busy time of year , but take time out to play as well.

Friday, December 3, 2010

Its all in the Wrist

This post is sort of aimed at one friend in particular but I thought some of you might like to see these pictures as well. Its just a few photos showing how I hold and throw a shuttle. Granted a video would be better.... and that may well happen sometime.

First, I'm using a Schacht end delivery (or also called end feed) shuttle. I must admit that I enjoy using these and they are my 'go to' shuttle! I have the 12" and 15" for wider warps. Besides the three inches, the difference is the weight, but neither are overly heavy and so don't tire the wrist.

This is a thirteen and a half inch wide warp on the Louet Spring and I have opened the shed and inserted the shuttle. Please note how I'm holding the shuttle. I call this palm up, forefinger on the end point and sandwiched between thumb and lower fingers. With a flick of my wrist, and my finger directing the shuttle, I throw it across.

And this is my right hand catching the shuttle.... please note the same hand positioning, but opposite side.  I think weavers get to be slightly ambidextrous over time. The Louet loom has a handle in the centre to prompt you to pull from there every time and to ensure that the centre of the beater and its reed, hit the fell line with no 'twist' to the equipment. Try an experiment next time with the end of a warp and try weaving with scrap yarn pulling only from one side all the time....yes, it can effect your weaving that much!  A great helper is to put a paper dot or something similar to the dead centre of your beater and aim for it each hand hold until it becomes a (good) habit.


I pull the shuttle free and clear of the warp, keeping the hand position as is. The shed is being closed and beaten by the reed at the same time. I had hubby watch me to make sure this is the case! Below my feet are shifting to the next treadle and the shed snaps open just as I push the beater back against the castle. Then my right hand inserts the shuttle into the shed and my wrist snaps it across. Repeat as necessary!    :)  
{ Taking these last two pictures was awkward. Since I'm right handed and the camera features a right side shoot button, I had to hold it upside down and later flip the picture!}

You can slowly build up to a good pace and then find yourself briskly marching along. The warp pictured above has floating selvedges and they don't slow me down a bit. Just remember 'over and under' and you're good.  Enter over the floater and exit under. 
Handy tip: place wide thick rubber bands on key pivot point treadles or even the mid way point, say treadle 5 in a run of 1 to 8. This way your feet always know where they are. Tabby treadles on one side of the run? Mark them with bands and minimize 'fast foot run on' errors.

Allen Fannin wrote a rather technical book on how to maximize your efforts at weaving and for those of you who like to do further research on this and other aspects of improving your methods to save time and also improve your weaving in general,  his book Handloom Weaving Technology: Revised and Updated  is available  if you click on the link.

A side topic on improving your weaving style is to make sure you are seated at the loom correctly.  You will know that your loom bench, seat, stool, or chair is just right if your elbows rest comfortably on the breast beam and your knees are at a 90 degree angle. Have someone observe you at the loom, perhaps when you are weaving and don't know they are there. The observation will be very accurate then :)   Be sure to pull the bench up to the sweet spot for you. Too far back and your bum bones just sort of perch on the edge. Too close and the edge of your bench can cut into the back of your thighs. Some weavers like my friend Lynnette is lucky enough  to use a slanted seat (you can see hers here) but what I do as a quick fix is to lift just the back legs slightly with coach coasters. It's only a 1/4 inch extra lift but it can take the pressure off.

I'm really big into all this as I have lower back issues and suffer from sciatica. No point irritating cranky nerves further if you can avoid it!  I also take care not to do any one thing for any great amount of time. I rotate from job to job:  weave, then wind a warp, sit and plan a project, weave, etc  I would say that I weave for 20-30 minutes maximum and then shift. If you are tired, then call it a day. Most mistakes are made when you are over tired and pushing to 'get that puppy off the loom!'. Every weaver has a time of day that is their peak; I'm an afternoon weaver and some days its hard to stop and go make dinner. Some days hubby stands in the door way with an empty plate and a sad face, and some days he rattles pots and pans and I take a hint!


Look what the postie brought me from Amazon.com !  I only just received it so have yet to really go through it to any great length but it's full of projects. Also the theory of how summer and winter works as only editor, Madelyn van der Hoogt can describe in her gentle but thorough way.  I'm one of those weavers who was caught with only a few issues of Weavers when they folded. I quickly ordered back issues while they lasted, and found more over the years at sales but still lament its demise. They seemed to go into more depth of how weave structures work, feature more 8 shaft + drafts, and help intermediate weavers progress beyond the basics. My favourite compilation is Twill Thrills.  Maybe Santa can order  one of the Best of Weaver series for you?

Tuesday, November 23, 2010

More Stitching... Part 2

Bruce on his Kubota
Winter 2010 has hit with a wallop and my hubby *finally* got to push some snow around!  He bought the tractor during a heat wave in July 2008 and it had yet to see any snow. From what we hear, this is just the start and the worse is yet to come. He'll get to fine tune his technique before too long!

There seems to have been some confusion with regards to what I tried to show you in my previous post. I think it might stem from me perhaps not showing the bottom edge of the towel and the dividing half inch of  waste yarn between towels (?)  Some thought I might be cutting the towels apart between the hemstitching.... er, nope!
I would ask you to please ignore for the time being all aspects of the actual project (yarns, sett and pattern) for now. That will be all revealed to you once they are off the loom and finished. We'll do a full show and tell then, including the draft. For now let's just focus on the techniques being shown. If I'm not clear enough with my descriptions, please email me at weeverwoman at yahoo dot com.  I am trying my best though! I have a whole new respect for weavers who write  how-to books! (Such patience!!)

  Here is a picture of a fully finished and hand hemmed guest towel I wove from a previous project to give you an idea of what we are trying to accomplish here:

I would like to take our previous hemstitching demo a bit further and show you another technique I've used before with good success. It might be a good idea to click on this link and reread the previous post and get back up to speed on our previous discussion.

As described in the previous post I have woven half an inch of scrap yarn to separate each towel woven, then I wove two inches for my hem allowance and hemstitched every six ends.  I slipped in my handy spacer yarn and then after playing with the treadling repeat a bit, I wove a medallion style pattern. It has a row of border treadling 1 to 8, then one little pattern repeat that I made sure reversed nicely, then a border row treadled 8 to 1. I wanted this to be a complete little section, or panel all to its self and you'll see why in just a minute. In the picture above I'm ladder hemstitching and working on the top row. Clicking on any of the pictures will enlarge them for better detail.

Then using the weft tail I left at the end of the pattern repeat, I hemstitch the top edge portion as well.

Next, I have placed my spacer in again and leaving a weft tail (approx weft yarn four times the width of the warp) I weave a border row and the regular pattern repeat. We'll pause the weaving here for now and pull the spacer out. I hold the left edge steady and pull the cord/ spacer yarn out slowly from the right.


Then for the fourth row, we hemstitch again!  Then we resume our weaving of the rest of the towel. What I do at the end of the towel is to revert back to my hem colour and weave another 2" in white. You could just use the same colour as the towel and weave a border repeat by way of hem allowance. Its all a matter of choice. I do not hemstitch this end out of choice. Just picture the towel neatly folded on the counter with the fancy hemstitching facing up. For guest towels I only hemstitched the leading presentation edge.... but you can hemstitch the last hem if you like.
A note on sewing the hems: I always handsew small towels and runners, traycloths and even some kitchen towels. I'm not much of a machine sewer and I find that handsewing produces a 'no line look' that I prefer. I do machine sew some towels but try to 'stitch in the ditch'.

I normally only do something like this panel hemstitching technique on narrow projects such as these guest towels or something very special such as a runner. Its gorgeous on the ends of a scarf! Yes, it is time consuming but it adds so much to a project! Guest towels are something special that you lay out by the bathroom vanity when you have guests in your home, or give as a gift. What better way to showcase what you do by a few extra special touches?  Once these are off loom, hemmed and wet finished, and well pressed.... they will showcase you as a weaver! 

I'm weaving along slowly and wish this warp was complete and off the loom to show you how they will look!

Let me leave you with a view of Maple Mountain after our first major snowfall. Its worth clicking on to see larger.

Weather forecast is in... more snow this week as two fronts collide over us! Tractor Man is at the ready...

Thursday, November 18, 2010

A Stitch in Time....


So this is a sneak peek at the guest towel pattern. The colour is a warm pumpkin and you can see the Maltese cross effect. I'll share all about the project in the next post. I'm covering a side topic that came up along the way.
Hemstitching!  I get emails from newbie weavers who ask me how to do better finishing on their projects and so this is a brief tutorial on this basic decorative needlework.

In this picture above, after a half inch woven of scrap yarn I have woven a two inch hem allowance and now plan to hem stitch every six warp ends ( I have three ends per dent in a 12 dent reed which helps to make that decision.)  I left a tail of weft yarn which is four times the width of the warp  dangling out on the right hand side. It may be easier to leave it on the left side if you are left handed. Bring the needle under the warp ends and pull through.


Then bring the needle back through from the same direction, but this time place the needle point down about two or three threads into the cloth, normally at the spot of the last warp thread taken. Pull the needle through. I personally don't go further into the cloth than two or three ends as to my thinking, the stitching purpose is to secure the weft threads into place and hold them there. Decorative embroidery is not my main focus here.


Then give the thread a good tug! You develop a feel for how taut to make it. Don't worry about the little 'holes' as this is all resolved during wet finishing later on. I also recommend that you don't do the stitches too loosely as it can increase the snag potential later, especially if you are hem stitching a scarf edge or shawl.

Then I go looking for a spacer yarn for the next step. What's that? Glad you asked...

This is a heavy seine twine cord which is used for rug warps and tapestries. I inherited this cone some years ago and maybe one day it will help form a rug warp, but in the mean time I need a 20 inch piece for this towel project. You can also use mop cotton or enough ends of a scrap yarn to create the space you are looking for.

Depending on the look you want to achieve you can use it doubled or singly......

I'm trying it on this towel doubled and lay it in snugly with a handy loop for pulling it out later. A bump with the beater straightens it nicely.

With my new weft yarn, I leave another tail four times the width of the warp and weave a few repeats of the border and pattern repeat. Then I gently hold the warp at the left edge with one hand and pull the cord out on the right.
Then I hemstitch by taking the needle under the bundle and pull it through.

Then as with the previous bottom row, I bring the needle back round again and place the point into the second or third row of weft and pull through and pull tautly.  This is called 'Ladder Hemstitching'.


A nice variation you might to try is 'Lattice Hemstitching'. {To see further pictures and details on either of these techniques visit here. }   Do the bottom row the same as the description above. The change comes on the top row...

In this particular method you divide the grouping by taking three warp ends from one group and combine it with three warp ends from the next group.


It produces a distinctive 'V' formation! I think it makes a nice alternative to the ladder. This is a mercerised cotton warp and so the ladder or trellis might lose some of their definition when washed.  The bundles being tightly secured helps keep their shape. I have also found that when linen is used as the warp, the ladder or trellis hemstitching stays much crisper looking.

Next post I will show you some another interesting border treatment.

On a personal note, we are still cleaning the house like crazy for viewings and waiting for someone to make us an offer. This is a tough time of year for this so we'll have to see....

My brother was here for a brief visit and we heard all about his recent trekking Manaslu in Nepal. He was there for just over three weeks and took many pictures again and has agreed to send me some pictures and a story line. It may be some time before this happens but I'm looking forward to setting it up for you!