 This is Dorothy and she lives near Lockerbie, Scotland. Then, here I am way over here on the west coast of Canada.....so how did we meet? Well, the internet of course! I have a Ravelry account under the name 'weever'. Ravelry recently made it possible for weavers to list their projects under the heading of weaving over the previous two catageories of knitting or crochet. We may be a smaller group there but we're now bonafide! (Basically infilitrating knitters from the inside out :)
This past August, I received an email from Dorothy via Ravelry's message mail. It seems she liked the way I finished off my handwovens and she said:
" I am just about to start a 10/2 tencel project, probably a scarf as that seems like a manageable first time fine weaving exercise. My loom is a 4 harness 6 treadle harrisville 36” wide so not nearly as sophisticated as yours. Would you advise me to use a twill pattern with a tighter sett or a plain weave on 24 ?"
Dorothy had also seen the eight shaft snowflake twill runner in my gallery there and was pleasantly surprized to hear that she could weave a snowflake twill on four shafts! I photocopied a draft by BC master weaver Laura Fry from an old Weavers magazine and sent it to Dorothy, along with some samples. We have been exchanging emails since and sharing ideas on weaving. We're also getting to know one another and becoming friends and who knows, maybe one day we'll meet!
Some of Dorothy's questions were about weaving with tencel as she has some special cones and never woven with tencel before. Judging by these photographs she sent me, she's comfortable with it now! It would also seem that I have started something in her home as she's acquiring new tools to finish her handwovens and her dear hubby is helping and recently bought her a new sewing machine! ( now, he's a keeper!) He's also a great photographer....
 The shawl looks lovely! Wonderful job Dorothy. Below is a close up of the pattern:
 The last picture shows how Dorothy took my fringe twisting tutorial to heart! She bought the foam board and a fringe twister and got busy!
(I'd love to hear from you if you have tried any of the methods decribed here and how it worked for you. My contact info is listed on the right hand side. )
 I am so happy to find that what I share here is actually helping people. Most satisfying! I feel like a proud Mother Hen :)
I invited Dorothy to be guest on the blog and so I will give Dorothy the last word here!
Hi there ! My name is Dorothy Stewart and I live in south-west Scotland in a place called Lochmaben, very close to Lockerbie.
I am a self taught weaver of five years, using a 4 shaft Harrisville 36” floor loom. My weaving has been very intermittent and based on wool scarves and shawls interspersed with tea towels ! Very basic stuff and my daughters are now dreading this year’s model of tea towel !!
I have always had a yearning to do something much finer and on a visit to Halcyon Yarn about 3 years ago I bought two cones of 10/2 Tencel, one purple and the other slightly off-white. They have stayed on the shelf until now as I didn’t really know what to do with them.
I found Susan on Ravelry earlier this year and signed up to her blog, which I found fascinating. The pictures of her weaving projects on Ravelry were just amazing and something I longed to be able to do myself. I learnt so much from the tutorials on her Blog.
In August, I plucked up courage and rather cheekily e-mailed Susan to ask for advice. Her response was amazing ! A parcel arrived at home with copies of the Snowflakes and Stars draft for four shaft looms. They had been prepared by Laura Fry and published in Weavers. I was instantly inspired to get started with my Tencel. Susan has provided loads of support by e-mail and over the last few weeks I have managed to complete two Tencel scarves using the quite complex twill draft.
I was able to follow Susan’s detailed instructions for fringe twisting and finishing from her Blog and as a result have two very professional items of which I am very proud.
I will never match Susan’s level of expertise nor the degree of complexity she demonstrates in her amazing weaving projects but I have certainly moved up a level from my rustic woollen scarves and tea towels !!
Susan has been a wonderful mentor and it is amazing to think that many thousands of miles apart we have established such a friendship. The power of technology nowadays is something else. It is so easy to keep in touch and share experiences. I certainly hope to continue to develop, in fact, my next project will be place mats in Bird’s Eye Twill. This was another draft in my ‘surprise parcel’ from Susan !
Suddenly, I am motivated and inspired to do more weaving and my thanks must go to Susan for this change. Knowing, that she is at the end of an e-mail is just wonderful and I feel very honoured indeed to be invited to be a guest on her Blog.


 Okay, that's under control... now what about lease sticks? The best spot for those seemed to be the big open space behind the shafts so I tied the lease sticks into place, using the side supports to secure to. Notice that I tape the ends 'just in case'. You only have to have dropped them once! There are also loops through the cross as well, another back up! The lease sticks can slide to and fro on these cords which is neat. When winding on, if the lease sticks meet a tangle, the sticks move, alerting you to a potential problem.
 This is how it looked from the front. There is no reed in the beater and there is a wrap around the front beam to hold things steady. Now I remove the cross loops. That sucker is corralled tight!


 Once all are done, then start on the far right bout and snug each group up tight, complete the knot and **quickly** move the next group and smartly race across the warp! When done, using the palm of your hand roll your hand from LEFT side back to the right, easing up as you roll towards the far right. Do this 2 or 3 times and then stop. Walk away and do something else for 20 minutes. When you come back the warp tension will be even. {no matter how fast you move tying from right to left, the right side will feel 'looser' when you are done. You'll want to tweak the warp endlessly! Jane Stafford demonstrated this on the Louet DVD on warping and this WORKS!} An old post of mine that shows this technique on my Louet loom is
  Then I went to the back of the loom and pulled my tie up cords. Eight treadles and I selected the centre eight for convenience. Almost there! Should be weaving soon...

 I was so focused on getting details right, that I missed this point entirely. The raddle sat on the top of my *second* back beam. THREE inches higher than the normal beam. In my old method, I would slip the lease sticks through the gap. Below, see the extra height on the back of the warp. I have looked at this several times and I can't see where else the raddle could have gone unless I take the entire second warp beam off the loom and I really don't want to have to do that. So I hung my floating selvedges over the upper beam as well. But in the test piece woven with scrap yarn, I had a hard time finding the floaters to move the shuttle over and under. So I moved them lower to the normal back beam. Much better.


 Let me show you what else I have in my studio that seems to work for me:
 The next chair I use is an old Ashford spinners chair I bought from a friend moving overseas. It has taller legs with no side supports which means it fits over the foot beam of my big loom! I pull up the chair and use it for threading. It means it's a 'one trick pony' but the cuteness factor means it earns a spot in the corner of my studio.
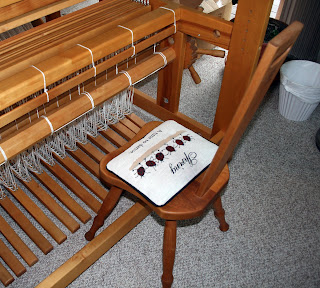 Weavers and spinners are usually asked to attend many outdoor events and its best to bring along their own chairs as you can't count on chairs to be there or be comfortable. Many years ago my husband pronounced that 'there's a garage sale down this street' and turned into a long cul-de-sac. Sure enough, there was a garage sale which was in wind down mode at the end of a long day. They had even taken down their signs at this point but welcomed us in to browse what was left. There in a corner were these two folding wooden chairs ... for $5.00. They conveniently fold flat for storage which is welcome in crowded quarters.
 So these are now my spare seats if I have company come to visit me in the studio or I need to bring a chair with me to an event. {Connor has spotted one of the sheep I have stashed around the studio and is waiting for it to fall into reach so he can 'kill' it... it might happen you know.}
 Now at Emmatrude, my big Woolhouse Tools countermarche, I have a commuter bench that was made in 1998 the same time as my loom. I have a full set of 16 treadles under the loom and I wanted to be able to comfortably reach all of them. So having a bench that glides closer is neat. It especially became important after I had my hip replaced in 2001. It does take some getting used to but once you are adjusted, you'd never go back to a normal stationary bench. One small adjustment I have made to accommodate my sciatica is to elevate the rear legs so the bench tips forward by a small amount. This is to alleviate the pressure on the backs of my thighs where I can occasionally get nerve pain from discs in my lower back. Oh, the joys of being older!

 I use these furniture discs where it's runner one side and carpet fibre the other. They are about a quarter of an inch in height and this is all I need to make a huge difference in the time I spend sitting there. The ideal situation is to have an


 I cleaned it up well. It had the 'patina' of many years of use and weavers who sat there. Spilt drinks, and marks, and years of hands touching it. Spilt liquids had caused the metal bars to rust and discolour the wood there they sit and the rubber bumpers had gone to hard little rocks. I stripped it down to bare bones and then oiled every part, wiped dry and then reassembled. Now this bench is adjusted for my Louet Spring 'Lilibet' and it making her debut here:
 Notice the height adjustment on the legs! This demonstrates why one bench does not fit all your looms. Those rubber bumpers are not the right size but it seems that they aren't making them anymore. I replaced both sets on both benches and wonder what I'll do in another ten years time?
 You may have several looms and methods for sitting at them, but only one bum! Make sure it's comfortable while it's there. Give a thought to those who silently serve.