Pages

Showing posts with label finishing. Show all posts

Sunday, January 26, 2014

It All Comes Out in the Wash...


I belong to a couple of weaving groups on Facebook and 'lurk' for the most part. One smart voice there is Margaret Coe  who ably stick handles questions from newbie weavers. Some months ago Margaret recommended a neat trick for when you start a new warp off. There it is shown in the picture above and some of my more regular readers will have noticed I have been using it for the past few projects.  Its the Two Stick Start. It the best tip I have tried in a long, long time! It just works. 

The warp above is 9/2 linen, for a 8 shaft huck lace that I have tied an overhand knot every sixteen ends and then laced on. I laid in three shots of a similar sized 'scrap' yarn which in this case is regular 8/2 cotton. I beat to close the gap and then laid in three more weft shots and beat again. It closed it but there is a slight gap. There can also be tension issues until the weaving progresses further. So I placed a short lease stick into one of the plain weave sheds, changed to the other plain weave shed and placed the second stick. I carried the cotton weft up behind the sticks on the right and started weaving plain weave and you can see how quickly it came together! The sticks provide a nice firm, flat base and from the knots to the top of the gold yarn is four inches! You are off to a real good start almost right away. { ...but it didn't spare me from a denting error and I had to redo some sleying two to three inches on the far right side as I had doubled my ends in one slot.  Geesh!}


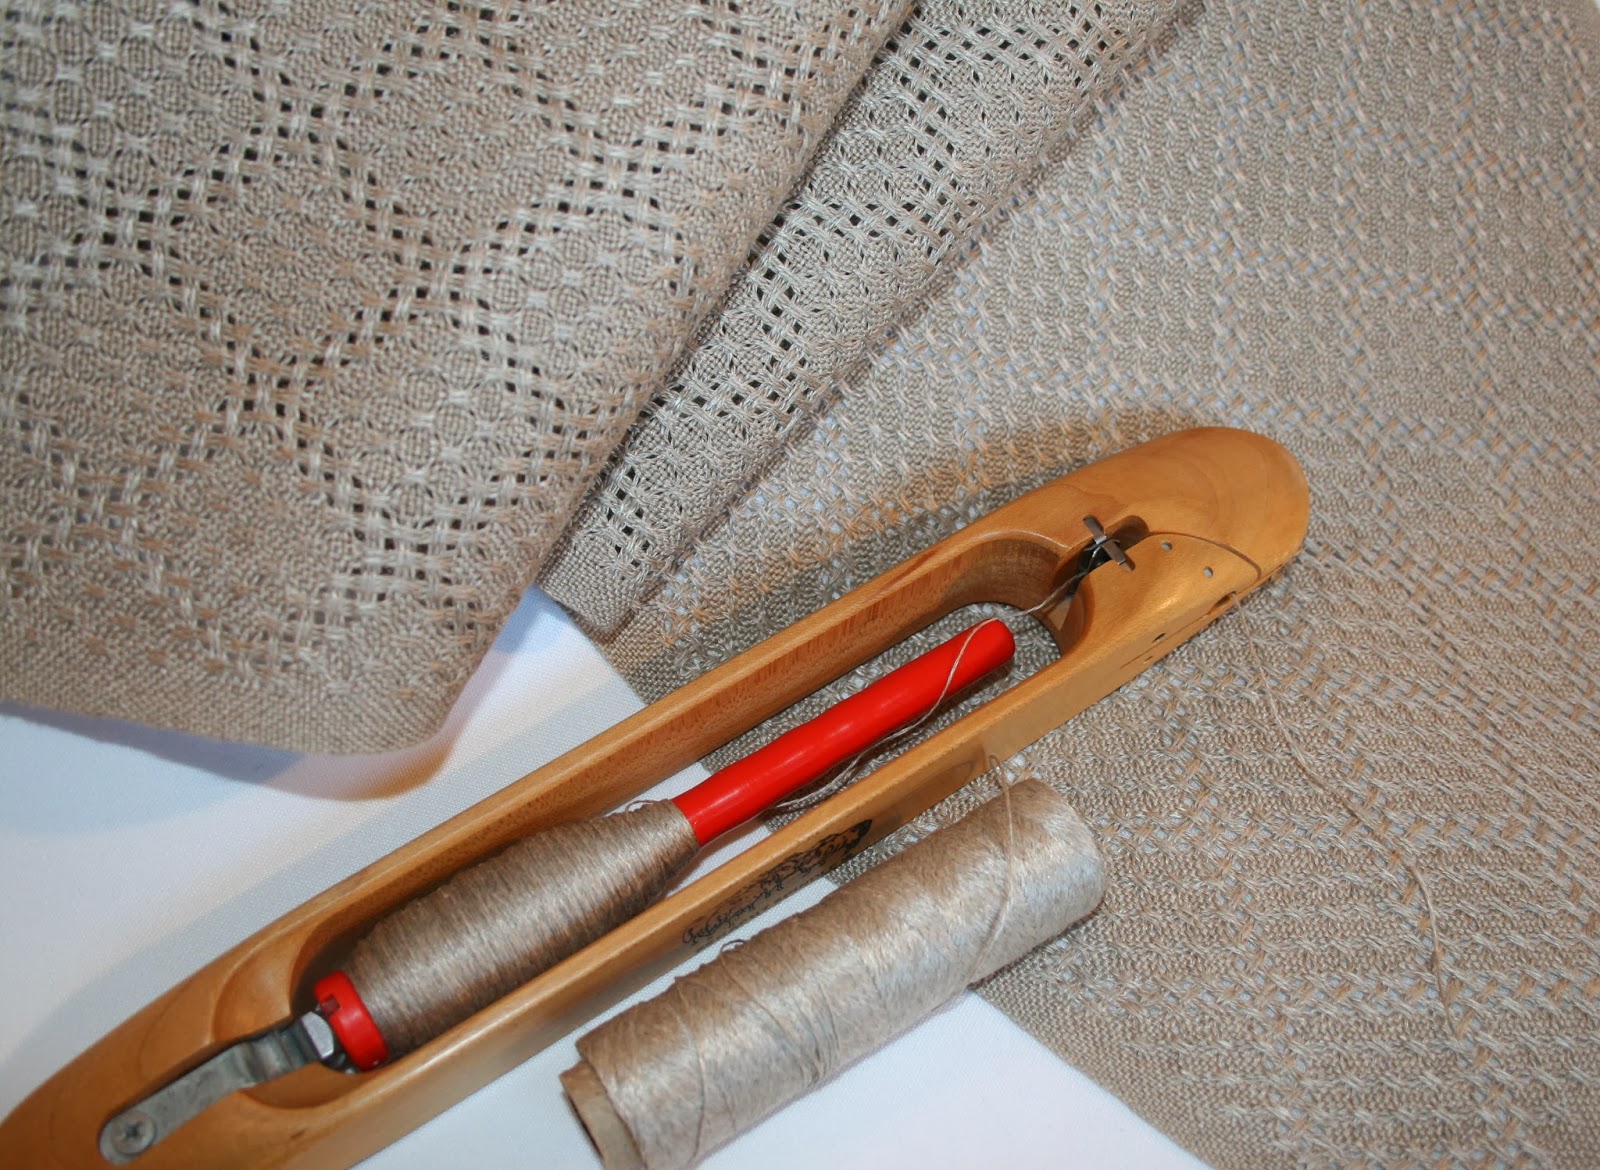
When I wound my pirns I ran the weft yarn through a clean damp cloth as I wound them. This tames the wirey linen and you can get a nice tightly wound pirn. The cloth is damp, and not overly wet so the yarn dries quickly. Once you use this on one pirn, all weft for the project must be done the same way or there will be changes in the cloth and the way it weaves up.

I wove six inches of plain weave for my hem allowance and then ladder hemstitched every four ends. I used a slippery synthetic cord doubled as my spacer.  It slips out quite nicely with a gentle tug. Next was one inch of plain weave to frame the lace, then the lace dance begins!


Last time I wove this pattern I used red 9/2 linen and used a sett of 22 epi. It was well balanced when all finished and pressed but I wanted it a smidge tighter so this time I set it 24 epi. Between the coarse linen, the reed marks and the lace five end groupings, the new cloth on the loom has streaks and lines all over the place. You can only hold your breath and hope it all comes out in the wash! (more on this line of thought later...)


I wove two runners using the same natural grayed / beige linen as weft. The runners were woven to roughly sixty inches from the end of one hemstitching to the next at the other end.  There is a small plain weave border down both selvedges and by the time you get to the end of a runner you begin to see the start of some troubled times to come. The plain weave and the lace areas take up differently as the lace centre is more textured and the plain weave is flat.  By the end of the runner you can see the plain weave edges pull down more and then curve upwards to the lace. I didn't experience this effect with the red linen runners. I checked a cone of the red today and it has a much softer touch to it. Perhaps as a result of the dyeing process?  This natural grayed beige linen has a much firmer feel to it... more wirey.  I decided to cut off the runners after each one was woven and retie back on. So the Two Stick Start got a good work out!

The third runner was understandably a bit shorter but I skipped weaving samples this time round and so that twelve inches helped out a lot. I used a snowy white 9/2 linen as my weft and it looked great! There is a nice colour separation on the lace floats so they frame the diamonds. White in one direction and beige in the other.  This type of two colour lace where the colours are more subtle appeals to me. Traditionally lace is woven in one solid colour warp and weft and usually the same yarn as warp and weft. {Beige projects are difficult and boring to photograph and if I used a lighting correction in the tweaking of the pictures, it turned all the colours really weird... so please bear up with the darker shots. I did use the camera flash and had lights on everywhere!}


I decided against using the serger on the raw edges as the serging line can be a tad bit lumpy. I didn't want that ridged line  with a flat hem. I used my sewing machine instead and did a stitched zig zag  which I think you can faintly make out on the raw edge in the picture above.  I steam pressed and measured the hem allowance. I'm going to turn it over by thirds.


The beauty of doing this with linen is that it takes a nice fold with just the fingers pressing. You can double check the measurement. I steam pressed it when I'm happy...then fold up to the hemstitching and press and pin.


As you can see by the close up above, a raised ridge line from the serger would have shown through and I wanted it flat, flat, flat!  The hand sewing was done by a running blind stitch and the three runners were an evenings work by the television.


Things started to get interesting the next morning when I filled the laundry tub to handwash the runners. The first to go in was the shorter white beige blend. I lay the runner on top of the suds and let it absorb the water. I came back a few minutes later and started to squeeze it out. I thought I could see a distinct line warp wise in the wet cloth! Oh crap....   I had used a full cone and part of another to wind the warp, but I had checked the batch numbers and they were both the same! Had someone somewhere made a mistake? I laid it to one side and then 'floated' the next runner on the surface of the water.


Look what happened below.... the side of the runner absorbed water at a much faster rate!


Even when wet there is still a colour difference between the two areas. I gently squeezed water through the cloth but did not wring it out. That would set creases into the cloth, especially the thicker hem allowance. After rinsing, I let it drain well and  rolled into a large towel to absorb the excess water. Once they were all into large towels and resting I sat and did some thinking on the situation. Two cones and two different  reactions.  I had a theory worked out.  Well, there was only one thing left to do and that was to see what happened when they were damp / dry and firmly pressed.

Here they are .... and first up is the white beige runner:


I could see no sign of any colour change! It looked completely even across the runner. This is a blend of beige and white so perhaps it obscures the issue? This one measures 12.5 inches by 55 inches finished.

So here are the all beige runners and both measure 12.5 inches by 61 inches finished.


Again, no sign of any variation in colour! Great!  So what was it?  I think the two cones, while the same batch number, there was a difference in the linen used. It would seem there was almost like a coating on the surface of two thirds of the yarn used.... and not so much on the new cone. It came down to the way the linen was processed.  I hope the washing process took care of this detail for the future. If not, there's no sign of it when dry thankfully. All the reed marks disappeared with wet finishing  and I would have to say the change in sett also worked very well. I would use this sett of 24 epi with this yarn again next time.

So now my Louet Spring is empty and I'm trying to work out what goes on next. Do you ever run out of inspiration from time to time? I know that there is a  ton of different weaves out there to try and so I just need to find one that appeals to me.  I have to clear off the Woolhouse loom and get a shorter towel sampling warp on there so there's lots of housekeeping details in the studio to take care of.   

My left knee has been troubling me and so weaving has been considerably slowed.... hence the long time periods between posts. Sorry about that but it can't be helped. I'm just happy to be able to be able to still weave!

Hubby Bruce hasn't received a surgery date as yet and as of our last check, they are now booking well into March (which is definitely not the promised January). This may end up placing his surgery and mine on a collision course later this late spring or early summer. Apparently there is a shortage of anesthesiologists.   Meanwhile my Dad is still in hospital and the news is he could be there for another week or two before being released.

I'm hoping this will all come out in the wash as well!

Monday, September 30, 2013

Golden Gate Bound

This is part two of my earlier post  detailing a weaving commission, so if you're running behind, you might want to catch the first part.  (Details and draft are there)

I've been quietly beavering away on a customer order from my Etsy shop "Thrums Textiles" . They requested two runners featuring the Gothic Diamond pattern, except these were to be hemmed and longer at sixty inches.  Also to be in two shades of gray.....

So once the small error in the reed was corrected, I got started again and I must say that the weaving went very well. I think the help from Bruce in tensioning the threads as the warp was wound  was the key to nice even tension. There was no issue with soft edges, and the only issue I had was that the floating selvedge thread broke a couple of times on the right hand side. (It always seems to be the right side. Any theories?)

I wove both runners to approximately sixty two inches and both had a six inch hem allowance, which will reduce to two inches on either end when all complete.  I even got some nice samples at the end for my records.

Now, normally I like to cut my new projects apart using the serger, but the bunching of the serger threads can add a line of bulk in a fine cloth made from cotton this fine.  So I had to take a different tack with this.


I switched to the sewing machine instead. What I need to do is stabilize the edges to prevent unravelling so I used a stitched zig zag. In the second picture you can see my scrap cloth with the silver stitches as practice.
(Click on any image to enlarge). It worked very well! All was secure and no bulky line.

Next up, getting the hems ready:


Steam press and check length is even.


Fold up to an even two inches and steam press again.


Fold up final fold to *just* to the bottom edge of the hem stitching, steam press again and pin in place.
Now they are ready for s little evenings entertainment!


The stitching was rather fine and so it took me time and (surprise) daylight hours only. I just about went blind trying it by night!  {Here is a link to what I do.} I soaked them in hot sudsy water for about twenty minutes and then I squeeze them through vigorously. I want the threads to shift and full and get rid of the reed marks. I did the same again with the rinsing. They were hung to drip dry overnight and stream pressed the next day.  

They had to have their time in front of the camera!  Both are identical in width : 13" One shrunk and came in at 61" and the other came in at 62". The hem lengths are identical and so the 'extra' is in the main body of the runner. Its hard to tweak that. 


The 16/2 mercerized is so fine and has a beautiful hand. I sett it at  36 ends per inch and its perfect


The ladder hemstitching: I used a double spacer and stitched every four threads.


The two grays work together nicely....

So they are being wrapped to go in the post and on their way to San Francisco, California. I visited there many years ago and have wonderful memories of brief time in the city. I can clearly remember our ship coming into the bay under the Golden Gate Bridge and then spending a day ashore exploring. I can remember going through the Ripley's Believe it or Not Museum, looking at Alcatraz through the viewing binoculars, and eating hot buttered crab down by the waterfront.  Great time! 

Sunday, October 9, 2011

Seeing Stars


Its the Canadian Thanksgiving this weekend and I hope my Canadian readers are enjoying family and good food!  Its a busy time of year with getting  the flower beds and gardens cut back for winter and other preparations. We were both inspired to get out and get busy one day and it seems our timing was perfect as its rained ever since!

I have been soldiering on and finally wove off the last of eleven yards of kitchen towels. The first post is here  including the draft and story. Since then that loom has been busy every day with weaving the yardage off and makes for dull reporting! My Louet has been sitting idle and 'naked' (horrors!) but that's changing soon.  More on that another time.   :)

Since this warp was all white with a few stripes, I can recall going through 3-4 cones of 8/2 cotton while winding the warp and about the same again as I wove. Once the warp came off the loom and I carried it all rolled up to the sewing table I was quite taken with the sheer weight of all that effort!


This is nine of the ten towels all rolled up beside the serger, with the first towel stretched across and being trimmed up on the serger. I usually cut and tie onto my new colour of serger thread and pull through. An acceptable cheat I think given the dismal all black and white hand drawn sketch of where the threads go for all four cones! Well, I forgot to take off the tension and some threads broke mid way. Two hours later I finally had it rethreaded and now my machine and sketch are colour coded against future faux paus. Something I should have done years ago! 

So here they are all folded and piled up waiting for the hemming !


I didn't think you'd want to wait another week or so while they are hand hemmed! They'd look like this after anyhow  :)

They are quite different from my other towels I've woven up in the past two years. Simpler pattern, and colours. They were easy to thread and treadle and I wove one up every day at 34 inches (okay most days!)

They are also a bit different in how I placed my pattern stripes. Its hard to show you clearly so I got out our little step ladder and took this picture. Not very artistic but it gets the point across!


(Click to enlarge)  The hems will be a small rolled hem so they are generous sized towels. I'll have to check the shrinkage once wet finished.  There are blue stars on the front and yes, it finally worked out right so they are reversible and have white stars on the back:


Once the holiday weekend is over, all heck is going to break out around here (again) as the work will begin on hooking the newly dug well to the house which is 300 feet away. Our driveway will look a bit rough for a few days. Three days if things go well and five if not! Wish us luck! I am so looking forward to a shower with full normal water pressure again...

Oh, and our new well is  'artesianing'  as we found to our surprise! The water level had filled all 182 feet of the pipe, plus the two feet above ground and has been trickling out the top cap. This caught our plumber by pleasant surprise and apparently its a good thing!  We will have lots of water for all our needs.  

Something to be thankful for....

Saturday, May 15, 2010

Finishing up Loose Ends

When I got back from Vancouver I took a day to settle in and get my laundry done and then turned my thoughts to the studio again. It was time to bring the black silk project to a close and move onto something new! It's had a lot of obstacles thrown in its way, along with me simply ignoring it for a time but now I had to bring this to a happy ending!


First I have twisted the fringes into small groups and you can see how I do this here. In the picture above, I'm hand sewing some bead embellishments to the edges. My full 'how to' on this can be found here. It gave me a chance to browse through my bead boxes and that's always fun. In fact I reorganised the boxes into colour groupings and labeled them. A nice side diversion!

I used mainly black seed beads and featured a bronze bead on the silk yak blend scarf. The silk camel blend weft is brighter and has a subtle colour to it. A soft beige cream and so I used a mix of small black seed beads and an irregular beige bead. They were both a bit stiff as some warps can be off loom but they headed straight to the laundry tub to be gently hand washed.

Once rinsed and tugged into shape, I hung them outdoors to drip dry. It was such a lovely spring day and it didn't take long before they were just barely damp. I brought them in and gave them a good hard pressing and hung them back up to finish drying. The next morning I have them a final light pressing and then sewed my label on and attached a hang tag. Done!!

Here's the pressed silk camel blend scarf showing my bead selection. The drape is soft and beautiful! Now these are rather dark coloured scarves for this time of year so I expect they will sit in my inventory till later this fall.
Here's the front and back of the silk camel scarf. It is fully reversible and has a 'summer and winter' kind of effect colour wise. You can choose which side suits the occasion!

Here's the drape on the silk yak scarf (which is also on the manikin at the very top of the post)

silk camel weft

Now I have an empty Louet loom and it just so happens that I have a sister who is planning an exchange of vows later this year. So I have some ideas I'm mulling over to mark the occasion.
More on this later!

Reno news (yup, there's *still* things being completed...)

The stairs were recarpeted while I was away and it sure looks nice. Seems that one small remnant in the warehouse was just enough (barely!) to do the job.
Next up is the tile back splash in the kitchen and the tile guy is coming Monday to do the job. Then the kitchen is finally D.O.N.E.

Last job of the current interior renovation is to get a new hand rail for the stairwell and we are looking at various wood profiles. The standard ones are too wide and heavy for the space.

Mother's Day was a nice one! Not only did I get an orchid I bought for myself but I received a second larger one. Turns out that Dorothy got one almost identical to mine. It hovers over my wee one like an older sibling! Another flower bud has opened since I took this picture and another flower spike is well under way.
Phalaenopsis or Moth orchid
*if you click on the link, it takes you to a web site with care instructions for this variety of orchid*

If you have a reasonable humidity level in your home and a bright spot, but not direct sunlight, then you can grown them in your home too.
I want to thank you all for your comments and good wishes on my father's recovery! Unfortunately he's been moved into intensive care after some other problems appeared and now we wait some more. That's the hard part... the waiting! I have been weaving to keep my mind off things and some tricky treadling means I have no room for thinking other than numbers. That's a good thing.

Okay, I have a bridal shawl to go and plan out...

Thursday, June 12, 2008

Reaping the Rewards


At long last my kitchen towel warp finally came off the loom! (There was a lengthy delay weaving this off while my back injury healed) To repeat the details again: it is an eight shaft false damask, with two blocks. I chose to weave them alternatively throughout for a more balanced look. I used 2/8 cotton sett at 20 epi, which is normally a plain weave sett. Twills are best at 24 epi but with these towels, that meant a thicker hand to the cloth and that's not what I was looking for with a towel. The warp was ten yards long and I got nine large towels. No samples this time as I have woven this pattern before. I used three muted colours of a burnt peach, soft plum, and light khaki green with the dividing threads are black. The use of black seem to accentuate the colours and intensify them. (White tends to wash colours out) I have a black ceramic stove top in almond with black accents so thought to try black this time. I used some of the colours in the warp as weft ( plums, peach and khaki) and wove coloured borders on some and for the most part, just used one colour and no border at all. One towel is a plaid as an experiment and it a bit too busy for my tastes. That will go into my sale box.

I normally weave some scrap yarn in between my towels and this gets trimmed off when I serge the edges of my towels. I find this minimizes the cloth from unraveling that is common with handwoven textiles.

I take the towel to the ironing board and turn the serged edge over and press flat. Then turn and press again for small hem, pinning it as I go along. The pattern has the benefit of 'lines' to assist you. I have turned the picture so you can see my choice in irons.

It's a Rowenta and has the right amount of weight and steam to make finishing projects much easier. A friend calls me the 'Queen of the Ironing Board' and I have tried a few makes and models and this one works for me. (I also have the Rowenta ironing board which is much wider than normal ones and adjustable up or down for a variety of heights.) Then I sew the hem by machine. Some like to hand sew hems but I prefer to machine sew towels and items that will be machine washed and dried for durability. Runner and 'dainties' I hand sew as they are normally hand washed.

I found that my machine needle kept punching a warp thread through and making a large pull. I would have to dismantle my machine, pull it out and then ease the thread back into place and start all over again. I changed needles, longer stitch, shorter stitch, go faster, go snail slow....it kept on doing this! If anyone has a suggestion, please leave a comment :)

On three towels I used 2/16's mercerized black cotton as weft. It produced a lighter weight towel and it accentuates the warp colours. I also tried out using a green cottolin as weft. It's has a scratchier feel but should soften up in time.

They make an impressive 'stack' and it feels good to be productive again. I have already have the next warp on and so we'll chat about that next post.