Pages

Sunday, August 11, 2013

Magenta Mood

Its the Dog Days of a long, hot summer. There was a light sprinkle of rain yesterday that was more of a tease than anything.  The rain specks dried in no time.   I don't want to spoil anyone's summer but a little rain sure would be nice right about now.   Its nice and cool in the lower level of our place and we have every door and window wide open to catch a slight breeze.


I've been working away on the Louet Spring and enjoying my current project very much! Remember my post about keeping a 12 shaft tie up from a past project and then using the old tie up with a new threading?  I kept this tie up: (click on any picture to enlarge)


Then I found this draft with its patterned tie up:


Then when I blended the old tie up with the M's and W's, I got this:


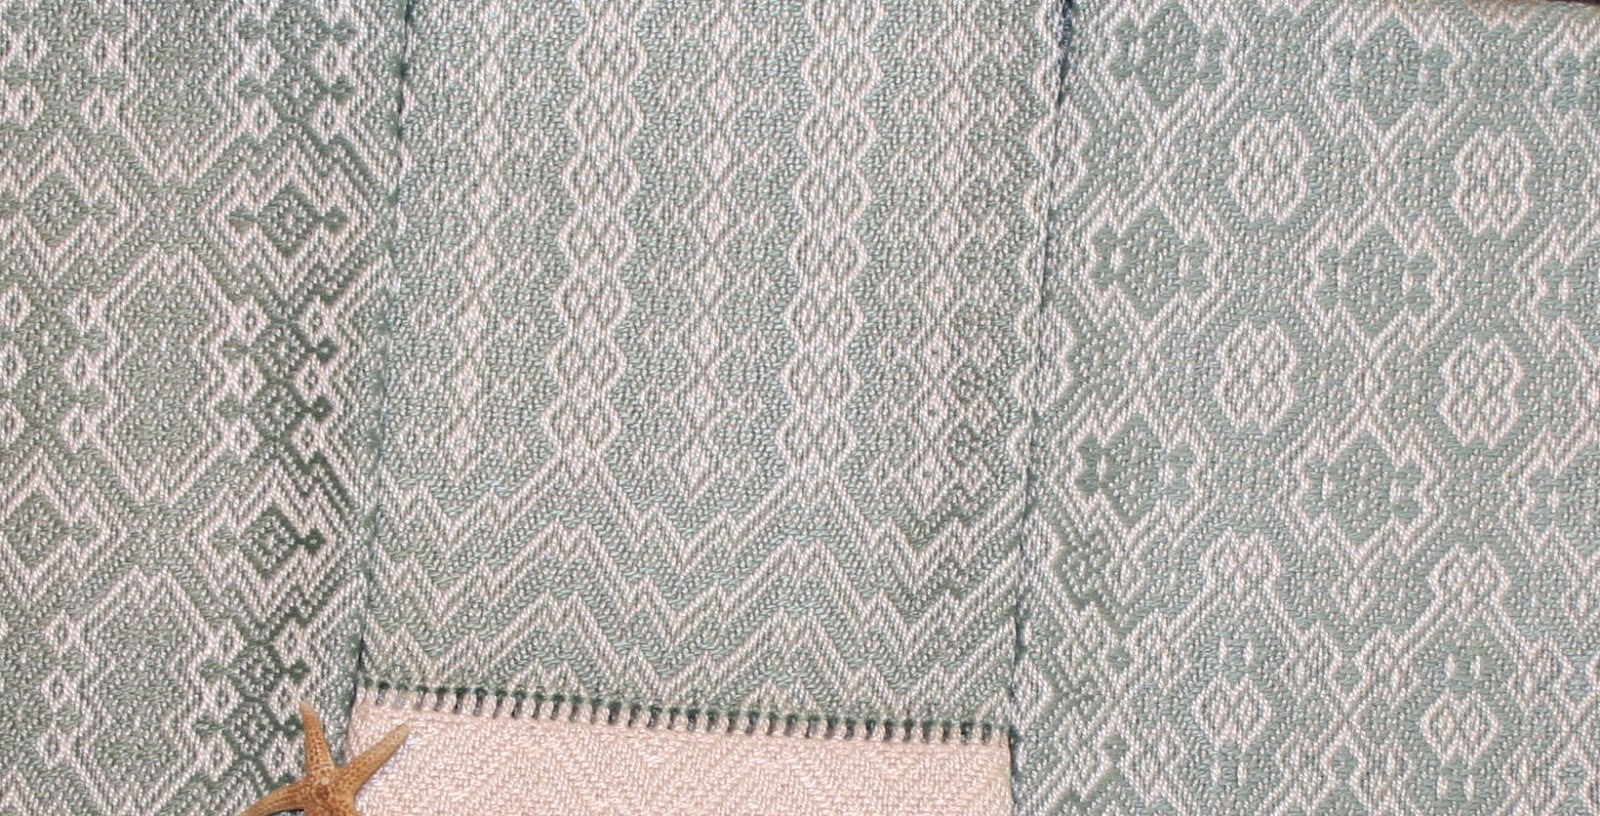
I could see the potential in this one and so got started right away. I wound a warp of 187 ends of 8/2 tencel, six yards long in a bright magenta for two scarves. I just love this colour and I seem to be using it in mixed warps lately. So how about all by itself?  The draft above looks complex. It even seems to have areas of subtle shading around the 'cross arms'..... so how would this look woven up on the loom?

I had some help....


Hubby, Bruce offered to tension the warp and then kept goofing around. I don't think he knew I had the camera so close and handy.... or maybe he did!   The beaming didn't take long, even with his help...

The tie up was already in place and so after lacing on, I got busy! I have been using lacing with tencel as it can be slippery.


First up was navy blue weft and trust me, it was hard to get a decent shot where the sheen didn't take over.  A repeat measured about seven inches. So it became difficult to judge the precise end to the scarf. You have a good length but still a little short, but add one more repeat and it goes a bit too long!  The navy blue weft scarf ended at about seventy  three inches. They lose some length off tension and after washing. It ended up a final seventy one inches by six inches in width)

I've used dark teal and magenta together before and loved the combination so I thought I'd try them together again....


I think you can see some of the iridescent effect. Its beautiful when it works like this.... Both colours are of similar values and depth of shade. The teal scarf end up being a bit longer and final length was seventy four inches by six inches.

Then they were fringed as per my usual method:


I went through my bead stash and found a couple boxes of teal beads, and even a close navy blue. I know I don't have any magenta on hand. I tried a couple of arrangement variations but in the end I took them all out and left the scarves plain.  The pattern seemed to be intense and the colours seemed decoration enough by themselves.   So I washed them up and hung them outside to dry. From dripping wet to just slightly damp took two hours with our heat wave.

I gave them a  firm pressing and left them to completely dry over night. I trimmed up the tassels and I got out the camera for their photo shoot. You have to get the angle just right. They have a different mood depending on which way you look at them! The sett was 24 epi and so they have a nice hand to them.  First the teal version:


I love this shot!


Then the deep and mysterious navy blue....


I had big plans to try the old tie up once more time with another threading pattern but I got a commission at my Etsy store to weave a couple of runners so that's the end of this experiment.  As soon as Brassard's opens their door from their annual staff vacation time I'll be placing my yarn order for the customer's requested colours.  So I'm back over to the big loom and winding on a project there.  

How are you enjoying your summer?   Are the fall colours in your stash starting to call you yet? 

I woke to cloudy skies and light rain today. Yippee! You can hear the garden sighing...

Wednesday, July 31, 2013

One Step at a Time

While I'm embarrassed to say how long this project has been going on, I'm also happy to crow that it's finally  finished now!  Do you ever have a project that you are happy to start but it turns into the longest 'short' warp ever?


So what happened? Well, I love the big loom... my Woolhouse Tools countermarche, but she needs a full leg extension to treadle and that can aggravate a lower back problem. So what happens is that what ever is on the loom must wait until I can treadle again comfortably.

Then add my left knee into the mix and a right foot as well and it complicates the issue.  While I complain about health issues, I rarely go into much depth on this topic but this time I will explain what I do know. I need a left knee replacement and waiting to see a surgeon. Then after that is done and healed, my right foot needs a mid foot bone fusion.  That requires a full three months to heal properly with no weight on the foot.  I drew the short straw when it came to the family's arthritis gene pool! None of this will be happening for at least a year

I share this as I'm not producing as much finished weaving as I used to and so things here at the blog will naturally reflect that. I'm continuing to weave regardless, but just not that fast.  

Baby Boomers are getting older and with that comes health problems such as worn out joints. It makes good sense that loom builders consider some modifications to their looms or at least have them available as options.  The 20+ tie up assist on my Woolhouse was one of those adaptations  and its very name means "twenty plus more years of weaving". I added mine after my hip replacement in 2001. It sure made life easier not having to crawl under the loom for tie up's.

Enough of my woes and lets get on with the towel project...


The draft came from Handweaving.net and is threaded like a turned twill. Its the tie up that adds the twist! The draft above shows the two variations I used separated by a black stripe. More on them later.

I used 22/2  cottolin that I bought way back when from Nordic Studios when it still resided in Canada. (It was later sold and evolved into the Lone Star Loom Room ).  My sett was 24 epi and my warp was 8.06 yards for seven towels. (see what I mean about not that long??) The idea was six towels for sale and one for us. I like large towels and so they were 25"  in the reed and a total of 618 ends. I literally had enough cottolin left for one floating selvedge only and the second had to be 8/2 cotton. The two pound cone was barely enough for the warp. I haven't come quite this close before!

My weft was 8/2 cotton from Brassards that I have on hand so this project was helping with stash reduction. 


I found the treadling of simply going from treadle one to treadle twelve the easiest on my joints. The work was evenly shared by both legs and so after one towel woven  turned twill style, I went back to the simpler version and did the other six towels the same. I made each of them a different colour and once off the loom and edges secured by the serger they looked to be a happy bunch! (see the very top picture)


I enjoy hand sewing the hems. I also find there is no obvious stitch line like a sewing machine produces. It hangs smoothly with no buckling along the hem line. The sewing holds up nicely and I have a combination cottolin and cotton towel that was hand hemmed back in 1998 that is washed regularly and still looks great. Remember that sewing machines are a 'modern' invention and for many hundreds, if not thousands of years it was just the simple needle and thread.

They were washed and hung to dry out doors on my drying rack. I brought them in for ironing while still a touch damp.  The final measurements were 23" by 28" so generously large.


lime


cinnamon


peach


royal blue


bubblegum pink


moss green


plum

I also managed to get an additional square measuring 24" by 24" in plum which I'm turning into a table centre and crocheting an edging. I'll show you that when its all done. Then were even some samples for my records which is always nice.    This project was hard work but I took it one step, literally, at a time.... 

Wednesday, July 24, 2013

Best Laid Plans...

About a month before our trip away, I got the bright idea of making up some guest towels to have handy as hostess gifts. I really liked the runners I wove up a year ago and had fun playing around with treadling variations I had woven up as book marks.


So I wound a warp of 10/2 mercerised cotton from Louet's yarn  for a dozen towels (yeah, I know, that's a lot of 'quickie' towels...)  My sett was 28 epi.  Bruce helped me beam the warp and I found I was short three ends. I double and triple checked and I was really three short.  So out came the weighted canisters and my handy dandy little separator. Why are there four? (five really) as two are floating selvedges...


The weaving was straightforward and fun. The hemstitching slowed me down some. I decided to use bamboo as my weft and I quickly went through the colours and  yarn I had on hand. I had to visit a LYS in Victoria and buy some new bamboo colours! 


I then has some issues with my left knee / right foot and so things came to a halt for a week and more. Next thing I knew, it was time to pack for the trip and so I decided to take in stock kitchen towels as gifts. I also took bottles of wine grown and produced locally here in the Cowichan Valley. A bit cheeky given the Okanagan Valley and Shuswap regions are major wine producers in their own right. 

After we got home and caught up on errands and Life, I picked up where I left off and carried on and finally a full cloth roll of twelve towels and some samples came off the loom. I got a BIG surprise when the brown paper roll finally dropped to the floor. Take a look at this!


This was a brand new roll of heavy brown paper and you can see a clear line on the left side.  It would seem the yarn was full of spinning oils! I have never see anything like this before. I knew they use a fine oil and sometimes even a wax when spinning the fibres up but my paper or sticks have never been stained like this.


I like hand hemming and so the twenty four hems took me about three or four evenings to get done. I did my usual hidden running stitch. You can see how I do this here

They were soaked a long time in hot sudsy water to get rid of the oils and then  laundered as per usual and hung out side on my clothes rack to dry. I gave them a hard pressing.  I think they turned out great, even if they are late arriving at the finish line.


There were three different versions with bronze and cream. Hems were woven with cream bamboo as well.


There were two woven with white weft against the cream warp and one guest towel was woven up all in cream. They look much prettier in person than here.... really nice sheen to the fabric.


 I also used this pretty teal bamboo weft, again with treadling variations. I found the softer colours looked nicer against the beige cream. I tried some darker colours (navy and blue red) but kept to my first choices.


One of the new colours I bought, periwinkle blue, is my personal favourite. Its almost a Wedgewood blue. They are all varying sizes in length depending on where I was in the treadling scheme as some would be to short, so I add one more repeat and then they would go over. They measure (roughly) 12" x 16" - 18".
So they may not have made it in time for the hostess gifts but they will be great to have on hand for the coming Christmas sales (yes, I really wrote *that* word).

I have to chuckle at the response to weaving these up. "Oh, I would never wipe my hands on those" but everyone  who comes to my house get a small regular store bought guest towel to use by the sink. Its a real dilemma for my guests. A common hand towel in a weaver's home?   But if I put a hand woven one there, no one touches it...   Its enough to make you go for therapy.... but its cheaper and more fun to weave instead.

Make a weaver happy and use a gift as it was intended when they made it.   They will be thrilled!   :)

Monday, July 15, 2013

M's and O's ~ a Sweet Old Thing

When I wove up various samples for the Guild of Canadian Weavers Test, one of the weave structures I had to study was an older weave structure called M's and O's.  I thought it looked pretty, almost like a poor cousin to the lace weaves. It seems it has an interesting history!
  • its believed to have originally come from Finland to America (and Canada) via Finnish settlers. They brought it with them along with their homestead belongings and shared in their new communities.
  • it was called  Sålldräll in Sweden. What does that mean exactly? Well, a search on the internet didn't get me any answers (in English!) so perhaps one of my readers can share with us in the comments.
  • Weaver Rose called it "Buckens and Owls" (this link takes you to a book review about the Weaving Roses of Rhode Island. Many of their drafts appear in Marguerite Porter Davison's book.
  • an interesting historical tid bit: Well's Dictionary of Archaic and Provincial Words, published in London in 1850,  in its correct spelling: buckeens. It is an Anglo-Irish word which formerly denoted a young man of the second-rate gentry or a younger son of the poorer aristocracy who aped the manners of the wealthy. The buckeens would spend the night  drinking whiskey and carousing in the halls and taverns and other disreputable behaviours.  So the buckeen and the owl are both night-birds, hence the association of ideas that brings the two words together. So why they named a weaving pattern after this is beyond me!
So what exactly is M's and O's anyhow?  Its a simple weave structure that combines plain weave with a textured rib weave. It depends on thread distortion to create the familiar M's and O's. The ribbed sections are looser  and so curve around the plain weave block and make the O's. Much like huck lace, the curving of threads happens off the loom and even more after wet finishing.

Its a nifty one shuttle weave that has a simple threading and treadling.  The treadling is based on 'weaving on opposites'. On a four shaft loom you get two blocks *.   A "block" is made up of  eight ends (also known as a unit), which is repeated at least twice to make a block. This is the tradition, but there is no hard and fast rule about block size, so one unit can also make a block.

 The threading is as follows:
  • Block A: 1, 2, 1, 2, 3, 4, 3, 4
  • Block B: 1, 3, 1, 3, 2, 4, 2, 4
{*Sharon Alderman says on a four shaft loom that you can get a third block by threading : Block C: 3, 2, 3, 2,1, 4, 1, 4}

 Lets leave that extra block C Sharon 'found' to one side right now and look at what you traditionally get on an eight shaft loom:
  • Block A and Block B as above, then,
  • Block C: 5, 6, 5, 6, 7,8 7, 8
  • Block D: 5, 7, 5, 7, 6, 8, 6, 8
Mary E. Black's Key to Weaving says there are two blocks on four shafts, three blocks on six shafts and four blocks on eight shafts. Of course Sharon's little method above could probably eke out an extra one or two blocks somehow!

Now to clarify, I'm not calling this a unit weave but simply referring to a threading group as a unit.  The warp ends in one block weave plain weave as individual ends while groups of warp ends weave together in plain weave order with the same weft in the alternate ribbed block. Since pattern cannot be woven in both blocks at the same time, M's and O's is not a true unit weave.

Click to enlarge this draft.


By referring to the threading guide above, you can see the following blocks (right to left of course) : 8 ends plain weave, A, B, A, A, B, B, A, B, B, A, A, B, A, 7 ends plain weave.
The tie up has Block A on treadles 1 and 2. Block B has treadles 3 and 4. You can see the treadling is based on opposites.  The plain weave is threaded on the selvedges but not part of the treadling sequence.  You can see the areas of plain weave (A) that surround the ribbed sections (B).

M's O's is a simple threading and  treadling, but here are some guidelines and advise to follow:

Classic M's and O's is best if the warp and weft are the same smooth yarn and also the same colour (much like other laces).  Novelty yarns, boucle and flake yarns all obscure the pattern.

The floats can become lengthy so finer threads are best. The floats can slide around so a fibre with some bite to it is best to hold in place them such as cottons, linens and even some silks.

The ribbed sections tend to pull apart easier and should be balanced with the plain weave blocks to produce a more stable cloth. Spread the blocks around!

Also ribbed sections will pull apart if the sett is too loose but then again, setting the threads too close won't improve the cloth either. It's best as a balanced 50/50 weave!

If a section of a given block is planned wide, then its best woven shallow; narrow sections look good woven deep.

Edges can be improved by threading four threads either side 1, 2, 3, 4.  Thread them but do not treadle them. Just proceed with your planned treadling (no tromp as writ). It improves the selvedges by preventing draw in by the pattern blocks. (you can also thread 1, 4, 1, 4 etc to produce plain weave)

Here is a silk scarf I wove for the tests using silk:


So what type of cloth is possible with M's and O's ? Well, its fully reversible and I have seen some very pretty valance curtains woven in cotton. Full curtains on sunny windows filter the light nicely. Linen is the best choice as it resists 'sun- rot'.

The surface floats mean it would make great cotton toweling and be absorbent. Its traditionally woven in linens for table cloth and runners and even hand towels.  Here is an example of a runner I wove some years ago on a four shaft Leclerc Artisat loom on loan from a guild.


I used 40/2 linen from Belgium, sett at  36 epi. It gets softer with each washing and I'm so glad I  slogged away on   stuck with all ten yards of it!  The rest were sold at sales of course and I have saved this last one for us. The linen is very fine at 6,000 yds/ lb, and I can see now that it should have been beaten harder to square. I also didn't know the trick about selvedges then but I think my edges turned out okay!


You can also turn the draft and weave turned M's and O's!  The main stripes will now go side to side. There are also some interesting effects that can be done when you think outside the box. If you have Handwoven Magazine, Nov/ Dec 2004 issue, pages 42-44..... take a look at the turned M's and O's scarf there that looks like honeycomb. I love this new take on an old weave!

When it comes to planning a balanced design using M's and O's I found a profile draft very helpful. So as a bonus this time, I'm going to discuss how a Profile Draft works.

Any weave structure that has a standard threading arrangement or unit and that you can combine units into blocks of any size, can be used in a profile draft format. So, using M's and O's for example:

1, 2, 1, 2, 3, 4, 3,4   is a unit of eight ends. This is Block A
1, 3, 1, 3, 2, 4, 2, 4   is a second unit of eight ends. This is Block B

On my silk scarf profile draft, I arranged the block into a balanced pattern and this is how I wove it based on using the M's and O's threading.  The line in the center is just that, the center, and the pattern reverses from there.


.....the chart above translates into this arrangement....


... and in this picture you can see the ribbed cells curving around the plain weave blocks. This scarf is beaten to square and you can see the difference that a balanced weave makes.

BUT....

You can also switch out the M's and O's threading above and then replace with threading units for huck lace (1, 2, 1, 2, 1 / 4, 3, 4, 3, 4 ), summer and winter (1, 3, 2, 3 / 1, 4, 2, 4) and even crackle (1, 2, 3, 2  (*1) 2, 3, 4, 3) for example.  {*Making adjustments for the rules that any weave structure may have  like crackle's incidental ends}

You work out how many shafts you have available to weave with , then how may blocks are possible depending based on your 'preferred' choice of weave structure (such as 4 blocks with overshot and two blocks with huck etc), and play with arrangement of the blocks and the colours you want to use.

For example if you are planning a baby blanket with several colours in the  warp and weft, then the block arrangement you have chosen may look better woven up in Summer and Winter than your  first choice of M's and O's. The different weave structure may blend the colours better or produce a better block arrangement, such as using crackle, for your project.

 At the risk of sounding like a broken record, a computer program makes it possible to play around with this design tool. That's what a profile draft is....a design method

Books I used to research this post and you might to look up for a further study:
  • The Handweaver's Pattern Directory by Anne Dixon
  • A Handweavers Pattern Book by Marguerite Porter Davison
  • Mastering Weave Structures by Sharon Alderman
  • Key to Weaving by Mary E. Black
  • Various Handwoven magazines....check the index for M's and O's